Friday, December 18, 2009

Roasted

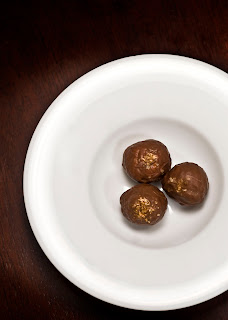
So I realize that it’s been a while. I would like to blame the chocolates, but in truth, it has been a combination of laziness and lack of material that kept me from posting. The special I made two weeks ago was nice, but needed a lot of work, and I decided to hold off on posting until I came up with something better.

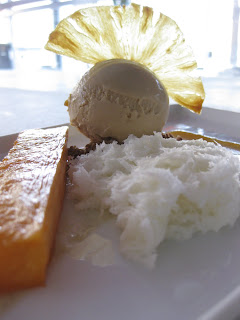
The original idea for this weekend was a Li Hing Mui roasted pineapple. Its something that I have done before, and really liked, but didn’t get quite right the first time. The nice thing about pineapple is that it is pretty much a year-round fruit, which is ideal for a menu that doesn’t change seasonally. The Li Hing (which is made from dried sour plums, sugar and salt) is huge in Hawaii, and adds a fun complexity to the pineapple.

Li Hing Roast Pineapple

Yield: ~12 pieces

2ea Pineapple

6oz sugar

1t Li Hing Mui

8oz Plum Wine

1) Skin pineapple and cut into roughly 6 large batons per pineapple, removing the core

2) Combine sugar and Li Hing Mui

3) Toss sugar with pineapple batons and place in a roasting dish

4) Add the plum wine to the pineapples, and roast at 350° for about 45 min, or until soft

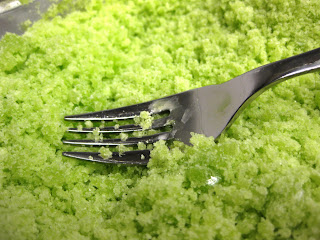
When I think pineapple, I think coconut. I decided to take a page from Ferran Adria, and try my hand at the “micro-sponge.” One combines all the ingredients in a foam siphon, and dispenses into paper cups. The mixture is then microwaved. The result is an incredibly light, moist sponge that tastes faintly of coconut and sort of like sweetened condensed milk. The key to the sponge is getting it to unmold without deflating. It is so light that if it is handled too much, or if it isn’t cooked enough, the air pockets in the sponge collapse.

Another flavor that I think is a must with pineapple is vanilla. Truth be told, vanilla is a good flavor to go with most things. Few people give vanilla the credit it deserves. I decided to incorporate vanilla onto the plate in the form of another new concept to me: fluid gel.

As the name suggests, fluid gel is a gel (usually set with agar agar or gellan gum) that has been vigorously agitated while it set, so that the end result is a consistency similar to a reduction or gravy. Fluid gels are really useful in situations where the flavor is damaged with heat (things like mellon which, trust me, should be left as close to uncooked as possible), in either sweet or savory applications. I recently ordered a few fun ingredients to play around with, one of which is powdered agar agar. I have tried working with the flakes, but they require a long time to soften, and then must be boiled for a long time in order to ensure that they dissolve, which it never seems to do fully. The powder, however, can just be added straight into your liquid and dissolves readily.

For me, I took the roasting liquid from the pineapple and added agar agar at 1.5% of the total weight (in other words 1.5g for every 100g of liquid), boiled for 2-3 min, and then poured into a container to set. Once set, I popped it into a blender, and blended for a few minutes, or until completely smooth.

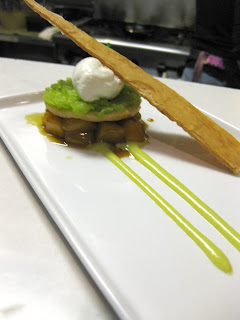
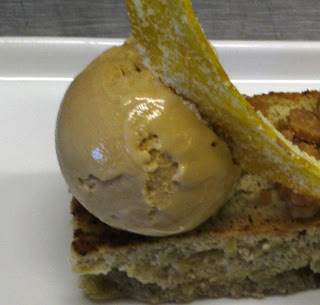
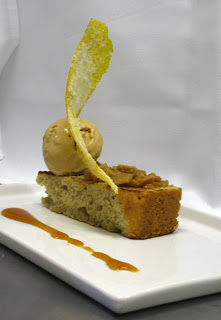
I finished the plate with a scoop of caramel ice cream on top of a coconut crumble, to anchor it to the plate, and a pineapple chip on top.


Monday, November 30, 2009

Beurre Noisette

Its official. My new site is up: Mcswiggenconfections.com

Interestingly enough, I tried importing this blog onto the site, in the interest of consolidation, but it doesn't sync up, and I'm not willing to keep up with two blogs, to I decided to just keep this one up.

All the chocolates I'm offering are surprisingly good. Even I'm satisfied with them, which is unusual indeed. I think there's something to the whole "practice makes perfect" thing.

I think that the chocolate that I'm proudest of, personally, is the Brown Butter truffle. What is brown butter? It’s a result of the Maillard reaction. Simply put, it’s the caramelization of the milk proteins due to heat. It’s the same idea as toasting bread, just a different protein that caramelizes. There's something about brown butter that makes everything better, whether sweet or savory. In the past few months I have played with incorporating brown butter into a couple different things. I started with a recipe that I saw in a magazine for brown butter sorbet. It was delicious, but even better as brown butter ice cream. I've also used it in my molten chocolate cakes, to great success.

About the same time that I was making my little brown butter discoveries, I was reading about caramelizing white chocolate. It’s a concept that has seemingly sprung up in the past few years simultaneously in a couple places. At D Bar, they had just introduced a pear dessert with a caramelized white chocolate mousse; Michael Laiskonis, on his blog, talked about the possibility of using it in a dessert as well. It’s pretty much the same idea as brown butter. If the chocolate gets too hot, the milk solids start to caramelize and color. This can happen accidentally just by having your water bath too hot, or intentionally by roasting the chocolate in a low oven. In my few experiments, I’ve decided that the slower you caramelize the milk solids, the smoother the end chocolate will be (the chocolate will begin to seize if roasted too hot or too long). I recommend keeping the oven at about 200° for about 2 hours, but it may take longer if you want the chocolate darker. In the end, you will have some beautiful golden white chocolate that tastes, unsurprisingly, a little like a deeper brown butter.

After that, it was just a matter of making a ganache and rolling them in milk chocolate. It’s amazing how much the Maillard reaction cuts the sweet taste and leaves a rounder, bolder flavor. Delicious.


Wednesday, November 25, 2009

Thanksgiving


When your job is to serve someone else, you will inevitably be asked to do something that you would rather not do. The old adage that the customer is always right rings truer than we sometimes think. A few weeks ago, a regular started asking when I would be doing a pumpkin dessert. About the same time, cries for a cheesecake special also started popping up. Something about fall makes people crave the fatty, the rich, and the homey.
Now, as I have said before, I have no real problem with homey. Fatty and rich? Well, there’s nothing that feels more Fall than that. It is ironic to me that I look forward so much to Thanksgiving, and yet I dislike so much of the “classic” Thanksgiving food. Cranberries: get those out of here. Stuffing: too savory. Mashed potatoes: boring. Pumpkin pie: no way. So when customers challenged me to make a fall dessert, I put it off as long as possible, but one can only delay for so long. With the coming holiday, I knew I had to do something.

I’m convinced that most people don’t actually like pumpkin. Most pumpkin pies are so heavily laden with spices that it mush be an attempt to mask the pumpkin flavor. I decided that if I were going to do something with pumpkin, it would be something that let the true pumpkin flavor shine through. A pumpkin and white chocolate semifreddo (which literally means “half frozen” in Italian) keeps the flavors light and smooth. To incorporate the spicy element, I made a pumpkin cake as the base of the semifreddo that has ginger and nutmeg and cinnamon; all the traditional pumpkin pie flavors. To keep the fall motif going, I added a sage-apple cider reduction that brightens up the dish with some acidity. As a last touch, I added in a little cranberry gelée. The cranberry, barely sweetened, also added a touch of bitterness to cut through the sweet white chocolate.

For most people that would have been enough, but I felt that the plate was a little lacking In my search for a pumpkin dessert that I would actually be willing to make, I stumbled across a lot of pumpkin cheesecakes. In fact, my original idea was to make a frozen pumpkin

cheesecake and satisfy both parties. The pumpkin element obviously changed, but the idea of frozen cheesecake stuck in my brain. After all, cheesecake is essentially a custard that’s baked. Why can’t it be frozen? Or better yet, churned and frozen. That’s right, its cheesecake ice cream. While the recipe needs to be tweaked, because it froze up a little too firm, the flavor is there. A scoop of that, anchored to the plate with a graham cracker crumble, and you have a nice looking dessert.

That’s two birds, for those keeping score.

Saturday, November 14, 2009

Under Ripe


There’s a part of me that believes that it’s impossible to improve on nature. Well, not impossible, but there are few things that beat a good apple eaten out-of-hand. Or cherries. Or a nice, sweet, delicious mango. When the product is good, there is no reason to mess with it. It almost seems a sin to make a peach cobbler if your peaches are sweet and juicy. If, however, you find yourself with fruit that are a little under ripe…


I have to admit that I spent very little time thinking about what the special was going to be this week. My mind was on chocolate, and the holidays, and our Guatemalan line cook getting deported… ya know, the usual. So, when my alarm went off this morning, I found myself doing what I always do when I don’t have I good idea: I copy someone elses.

Tarte Tatin is on a lot of menus right now because apples are amazing this time of year. Woefully, apples don’t really fit with the sushi theme. Believe me, I’ve tried to make apple desserts at Jianken, and while they’re all taste, they are decidedly “not sushi.” I instead found myself looking at mangoes. I searched three of my local supermarkets to find good mangoes, but even the nicest ones were firm at best. A smart person would scrap that idea and go back to the drawing board, but being stubborn as I am, I decided that I would make this Mango Tarte Tatin anyways. I bought them, peeled and ate a bite of one and was pleasantly surprised to find that while hard, they were still fairly sweet. I diced them up and into the oven with some palm sugar, which has a slightly molassesey taste, and butter.

Classically, Tarte Tatin is apples that are baked with sugar and butter with the crust baked on top. The whole thing is then flipped over and cut into wedges. It should be very caramelized and dark. Mangoes, when roasted, tent to drop a significant amount of their liquid, which means they would turn to mush before they started to caramelize. To get around this, I roasted the mangoes until they were just soft, and drained off all the moisture, reserving it. I then made a basic clear caramel sauce, but used the roasting liquid in place of the water.

To order, the caramel is heated in a small saucepan with the mangoes, then stacked in a ring mold. A pre-baked circle of Sablé Breton is added on top, followed by cucumber granita, that way, when the ring is removed, you’re left with three distinct layers. I finished off the plate with a little avocado cream, a quenelle of chantilly, and a phyllo crisp to add a different kind of crunch.

Cucumber Granita

Yield: ~1 quart

20oz English cucumber, seeded and chopped

4oz Sugar

4oz water

1T Lemon or lime juice

1) blend all ingredients in a blender for 5 minutes, or until completely smooth

2) strain with cheese cloth or a coffee filter over a bowl. Allow to drain until all liquid has separated out

3) freeze solid and flake with a fork

Why cucumber and avocado? Well, I love using avocado for dessert. It’s delicious and creamy and possibly better sweet than savory. In fact, if everything goes according to plan, I will be adding some sort of avocado chocolate to this year’s collection. Cucumber granita is something that I have wanted to try making, partly because I think cucumbers taste more like a melon than a vegetable, but mostly because I have always had, in the back of my mind, an idea to make “dessert sushi” that actually uses sushi flavors, not just the style. Plus, its pretty rare that you can get something that green in a dessert naturally. That’s right… there’s no food coloring in it.

“But David,” you say, “That plating looks a lot like the apple Tarte Tatin at D Bar.” Why, yes. It does. I like to think of it as an homage to them, not as copying. Either way, I think that the final result was damn good.

Saturday, November 7, 2009

Jiggle


The restaurant is undergoing a potential menu change. It’s a very exciting time. I designed the previous menu, based on guidance from the owner, and it’s an ok menu, but it has been almost two years, and I’m tired. Time to move on.

I am realizing that I really do believe in the idea that it is easier to be creative when you have restrictions. Or at least, the final result is better. At Jianken, there are a lot of things that need to be kept in mind when designing a new d

essert. First, it has to be Asian influenced. There are a few items on the menu right now that really have nothing to do with sushi, and I’m embarrassed that they are still on the menu. Secondly, any line cook has to be able to plate it. My short time at D Bar has made me long to quenelle things and make the plating really elaborate. Unfortunately, the line cooks couldn’t put the plates out the way they were supposed to look, and that’s far more upsetting than just forgoing the quenelle. It’s much better to have a simple plate than an ugly one.

So, with that in mind, I set out to revamp our current panna cotta, which is a lemon-yogurt panna cotta with yuzu curd and a ginger tuile. I love yuzu, so I wanted to keep that part, but change up the panna cotta base, and maybe change the plating as well. Enter: Black sesame.

Black Sesame Panna Cotta


Yield: 3½ Cups, or about 7 4oz ramekins

12oz Whole Milk

12oz Heavy Cream

4oz Sugar

3T Black Sesame Powder*

1T or 9g unflavored gelatin


1) bloom gelatin and milk in a mixing bowl.

2) In a pot, combine cream, sugar and black sesame powder

3) Bring to a simmer and pour into the milk and gelatin mixture

4) Wisk to combine thoroughly and strain

5) Pour into ramekins or silicone molds. Allow to set for at least 2 hours

*This can be found at asian stores. You can make your own, but definitely remember to strain the final custard.

Traditionally, I haven’t been a huge fan of sesame period, but it is a very distinctly Asian ingredient, and a lot of people love it. While browsing the interwebs, I stumbled across this recipe, from a food blogger with a lot more experience than I. I decided to give it a try. The recipe itself needed only a little tweaking in order to make it stand on its own, as opposed to being eaten out of the ramekin. The flavor is really quite beautiful; there’s just enough black sesame to be earthy and delicious without overwhelming the taste buds. Paired with the yuzu, it was awesome.

Yuzu Curd

Yield: ~1lb

3oz butter

6oz sugar

3oz Yuzu juice

2ea eggs


1) in a steel or other non-reactive pot, combine eggs and sugar. Wisk together to combine.

2) Add Yuzu and butter, and start over low heat.

3) STIRRING CONSTANTLY with a spatula, cook until thickened and bubbles start rising to the surface

4) Pour off into a bowl or container and cover the surface immediately with plastic to prevent a skin from forming

Of course, there was a problem. How to transport it? I wanted it to stand on its own, but just barely. If one were to try to pick it up on its own, it would fall apart. That’s where the Sablé Breton comes in. A thin sable crust that has been topped with a white chocolate feullatine would allow one to pick up and move the panna cotta without actually touching it, and the white chocolate also prevents the crust from getting soggy. The panna cotta is allowed to set in its mold, and then frozen solid. Once its solid, you can unmold it without worrying about damaging the custard, place it on the sablé, and let it thaw. The end result is soft, jiggly custard on top of a crispy crunchy cookie. To finish, I’ve added a little tart yuzu gelée and a honey-sesame tuile.

Honey Sesame Tuile

Yield: 10 oz

7oz Granulated sugar

3oz Honey

Sesame seeds

1) Combine sugar and honey and mix thoroughly, until a uniform paste is formed

2) Place scoops of paste onto a silpat or parchment. A tablespoon sized scoop will make roughly a 4 inch circle

3) Bake at 400° until only small bubbles appear

4) Remove from oven, and sprinkle with sesame seeds

5) While still slightly warm, remove from silpat and twist or break into organic shapes

Thursday, November 5, 2009

Measurements

Any baker will tell you that consistency is the key to good pastries. It’s true.

Somehow, though, my mom can still get away with the "a little of this a little of that" method. How is it that her baked good still come out better than mine, I don't know. I chalk it up to experience. For generations and generations, people have used the cups and cans and pinches to measure out their recipes, with good result, so I certainly can’t say that they are wrong. That method, however, doesn’t work for me.

If I want desserts to come out nicely and consistently, I have to measure precisely. For the most part, I like using weight. Metric is the best, but for the most part I do things in ounces because there’s rarely a need for the super accuracy that metric gives you. I do measure some things in the Imperial system (like baking powder or salt, because its easier to grab a teaspoon than my scale) but only when they consistently have the same volume. My cup of flour is not the same amount as your cup of flour, but four ounces is four ounces no matter where you go (on Earth, at least).

If you want to use my recipes with good result, I highly recommend going out and buying a scale. You can get a simple digital scale at office supply stores for around $20. Ideally it will be able to switch between grams and ounces, but it’s not the end of the world if it doesn’t. With a good scale, any of the recipes I post should come out nicely.

Thursday, October 29, 2009

Nostalgia


I don’t tend to think of myself as a nostalgic person, especially when it comes to food. The things I like to cook are certainly not the things that I could see my grandmother making. That’s not to say that I don’t like eating warm homey chicken’n’dumplings or rich delicious sugar cookies. It’s just that, when I think about cooking for the restaurant, the food that I get excited about is usually something more modern. So I was surprised when I found myself begging my mom for her Banana Bread recipe, which she got from my grandmother.

Banana bread is one of those foods that I grew up on. Bananas, being cheap and relatively nutritious (for a fruit), were something that was always around the house; and when there’s bananas aplenty, one can be sure that there will eventually be over ripe bananas. Banana bread is an ingenious use of a product that is past its prime.

I have tried this recipe many times, and many ways, but came to one conclusion. The bananas MUST be overripe. Anything less results in a final product ranging from “just alright” to “absolutely foul.” You could add nuts, raisins, or chocolate to the batter, but why mess with perfection? Here is your basic banana bread recipe:

4oz butter

8oz sugar

2ea eggs

10oz Banana purée

11oz flour

1t. baking soda

1/4t. salt

1) Cream butter and sugar until lightened in color and texture

2) Add in eggs one at a time to ensure a smooth emulsion

3) Add bananas and mix to incorporate. Be sure to scrape the bowl well!

4) Mix in the dry until just smooth. Over-mixing will result in a tough bread.

5) Bake at 375° in a 9x5 loaf pan for about 45 minutes, or until a tooth pick comes out cleanly

Thinking more about the plate as a whole, I like my banana bread toasted with butter, so warming it in a buttered sauté pan is a must. There is a dark rum caramel sauce to counter some of the sweeter elements. Also on the plate, I’ve added some toffee bits for texture and to anchor the caramel ice cream, which was sprinkled with a little Murray River salt. To finish, a fired plantain chip tossed in sugar, because it looks an awful lot like a banana and it got adds some nice height to the plate, along with a nice crunch. I think it came out very well. My only fear is that there isn’t enough to counteract the potential dryness of the banana bread. Something to think about…


The Beginning

This is a first for me in a lot of ways. I’m not the kind of person who is good at keeping up with personal projects, especially those involving chronicling my experiences. Somehow I always feel like something gets lost in the telling. With any luck, though, this will be different.

I have to admit that two weeks ago I would have not thought that I could be at all interested in blogging. It wasn’t until I started reading a few choice food blogs in search of new recipes that I realized what I was missing. There is a wealth of knowledge out there, and while I love my cookbooks, they aren’t very dynamic. With the leaps and bounds in point and shoot camera quality, and of course the fact that the web is mostly free, making a half decent post or illustrated recipe is very possible.

As the title implies, these are experiments. I tend to think that everything I make ends up being a little experiment. Having still less than 5 years spent in the industry, its really hard for me to say that I'm an authority on anything.

My goal with this blog is to post weekly about a dessert from the restaurant. Hopefully it will include some of my process and brainstorming, along with background information and recipes. I haven’t decided whether I will post all recipes required to make the whole plate, or just a few components. I’m always tweaking my recipes, and I feel that once something is published, its much harder to edit and revise, so I think that I will most likely only post recipes that I am very satisfied with.

I think that’s all for now. There will be more posts on my methods for measuring and finding ingredients and such, but those are for another time. Soon I will actually have a real recipe to share with you all, but until then, thanks for reading!